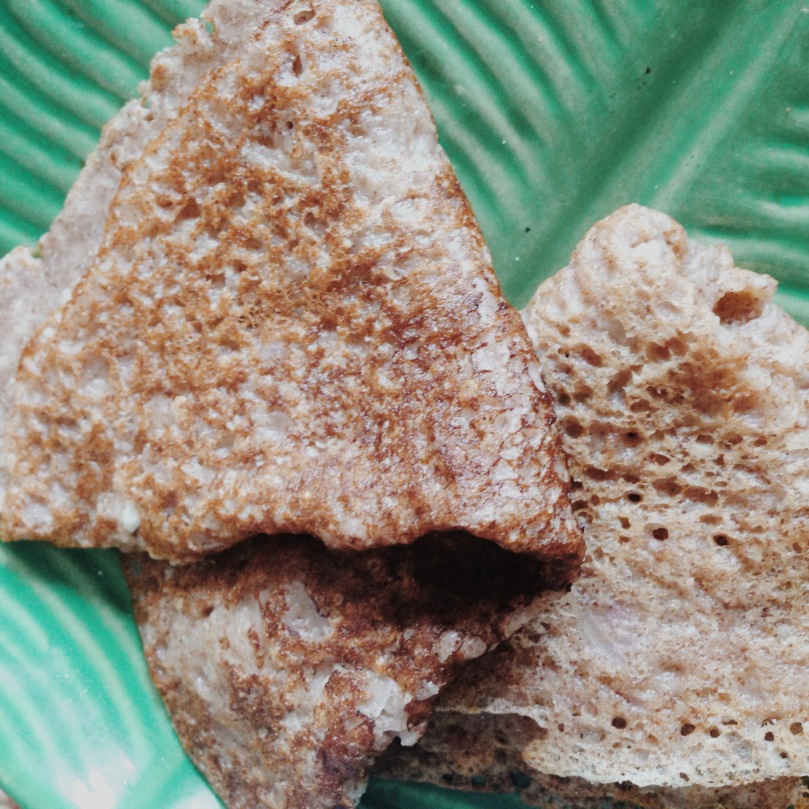
Sprouts and Barley Flour Pancakes / Bajre ka Pooda

Poodas or savory pancakes are our go to breakfast after long walks. They are easy to put together and very healthy. A Pooda is basically a mix of flours, spices and water. When I was younger, mum used to make these with besan/chick pea flour, onion and green chilly. However I out-lived my love for them and had stopped eating them for good 10 years. Recently my mother in law made the most soft and delicious poodas with wheat flour. Since then there is no looking back, I am hooked with flours like bajra [pearl millet], ragi [finger millet], jowar [white millet], singhada [chestnut].

So here is one of the versions of many that we make now 🙂

You shall need: [Serves 4]

1/2 cup Wheat flour

200 gms steamed and mashed sprouts- I used moong sprouts. Put them in a cooker with 1/4 cup water and it shall becomes soft in 2 whistles. Mash using a spoon or fork.]

1/2 cup Bajra Flour

1/4 cup Rice flour

Salt

2 green chillies- chopped fine

water

Red chilly powder

1/8 cup chopped corriander

Oil

No

Non stick pan

Spatula

Method:

  • Mix the flours, corriander and spices.
  • Add 1.2 cup water and mix, now add the sprouts mash.
  • Add more water and mix.
  • The batter should be of a pouring consistency.
  • Heat a pan, add few drops of oil.
  • Pour a ladleful of the batter on the pan and spread evenly.
  • Cook it well on a medium heat.
  • Once the lower part darkens, flip gently and continue cooking.
  • Repeat the process until the batter is done.

pooda2 (1) pooda1 (1)

Cheers,

Pallavi

2 green

Paneer Methi Paratha – Cottage Cheese Fenugreek Leaves Flatbread

My earliest memories of food have been with Parathas, All sorts, aalu, mooli, gobhi, paneer, missi roti, dal paratha, leftovers paratha… Oh so many.

Most of the lunches at school were parathas too. 🙂 Here is my fav version.

Paneer and Methi 🙂

You shall need: [serves 1]

75 gms crumbled Paneer [put the paneer on a cloth and let the excess water come off]

1/3 cup finely chopped Methi leaves/Fenugreek leaves

Salt to taste

1 tsp coarse Anardana powder

1 tsp lemon juice

Chilly powder to taste

1/2 tsp dhaniya powder

1/2 tsp roasted jeera powder

Paratha dough [wheat flour kneaded with oil, salt and water to a nice and tight consistency. let it rest for 20 min]

Oil

Spatula

Ghee

Dry flour

Rolling board and pin [chakla belan]

Tava [flat griddle]

Method:

  1. In a bowl, mix the paneer, methi, salt, chilly powder, lemon juice, salt and anardana powder.
Processed with VSCOcam with c1 preset
  1. Take a golf size ball of the dough. Roll it using some flour.
  2. Apply some ghee in the center and place half of the paneer mix on it.
Processed with VSCOcam with c1 preset
  1. Wrap it in a parcel and roll it again.
  2. Heat the tava and add few drops of oil on it.
  3. Place the paratha on it and cook it on both sides.
  4. Add little oil as need be.
  5. Be sure to cook the paratha on medium flame.
  6. Serve with love
Processed with VSCOcam with c1 preset

Cheers,

Pallavi

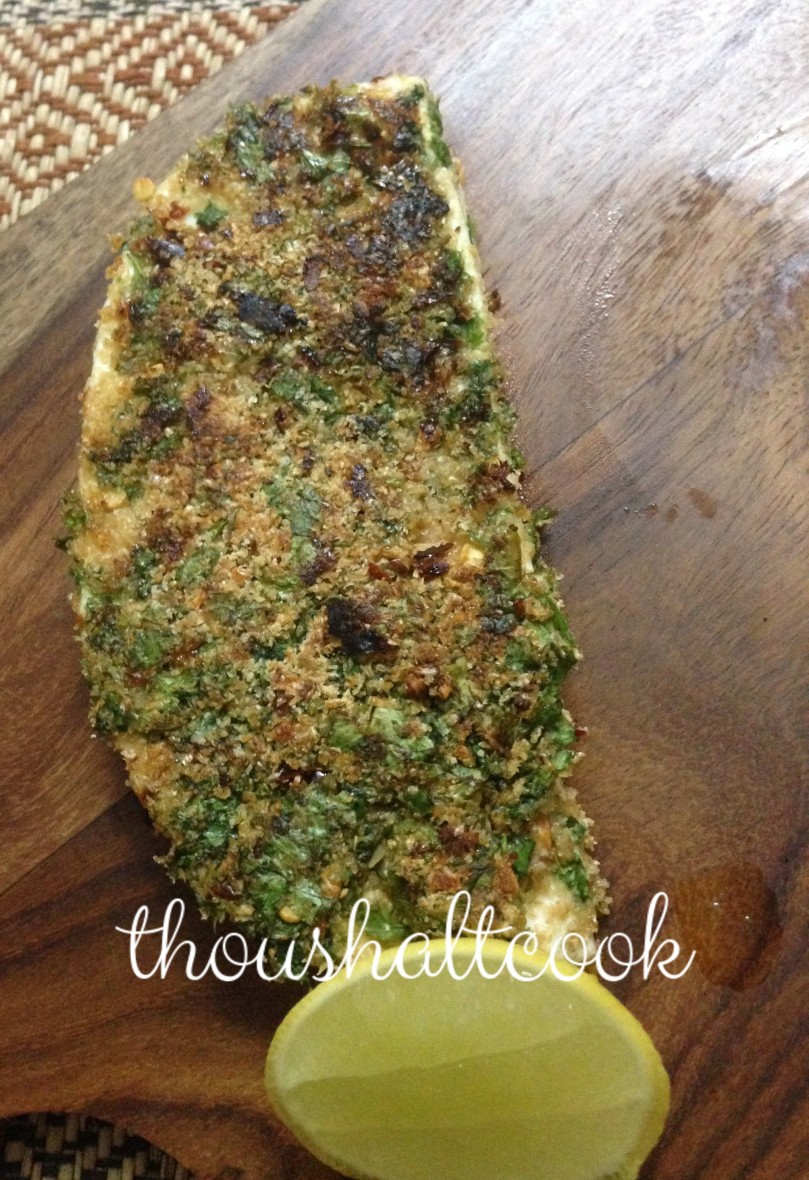
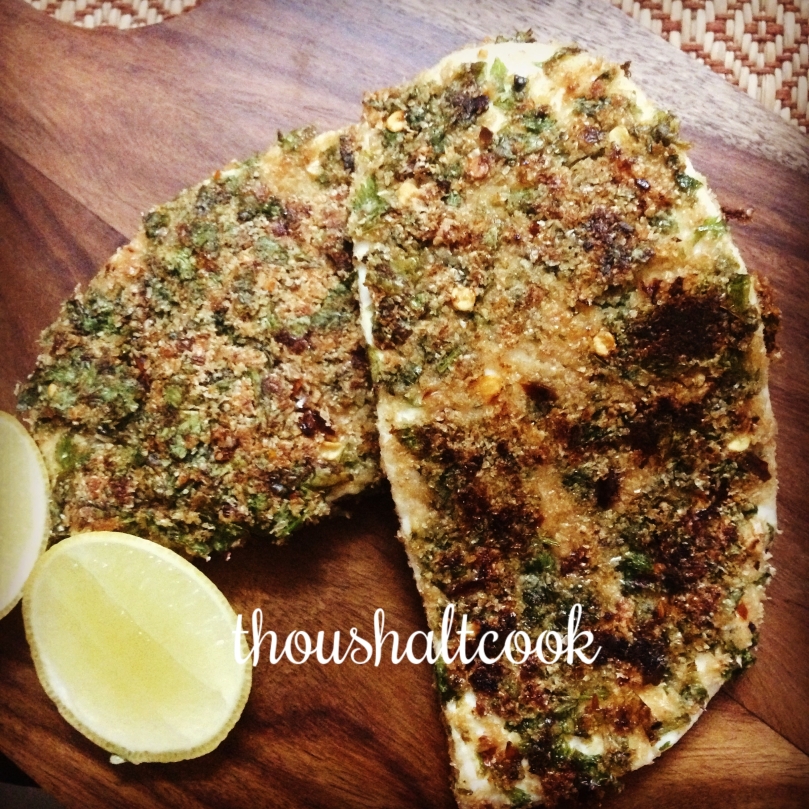
Herb Crusted Paneer [Without bread crumbs]

All these food shows on TV show some version of crusts being used on different ingredients. What has been stopping people to use different things to make the crust – other than Bread crumbs.

To be fair this was not the first thought that came to me :P. I was out of bread crumbs and was too lazy to make fresh one. So I googled “Crust without breadcrumbs”; all the results were telling me was “How to make breadcrumbs”. So I thought lets atleast read a recipe and then decide how to tweak it.

First thought for the base came to me was salted peanuts. Second thought was blanched almonds. Third was rolled oats – coarsely chopped. And I promise the final one was Wheat/oat bran. So I used the bran for this recipe because there was a box that was just lying around :P. I have been using this bran in chapatis and parathas but since husband didnt really like it, I use it only for mine.

Let us get to making this gorgeous paneer. 🙂

You shall need: [ serves 1]

75 gms paneer [2 chunks/slices of the size that you like]

4 tbsp oat bran

3 tbsp chopped fresh herbs [ I used corriander, Basil and mint]

1/2 tsp Salt

1/4 tsp red chilly flakes

1/4 tsp lemon juice

1/4 cup milk

Oil

Shallow non stick pan

Spatula

Two small plates/shallow bowls

Method:

  • Mix the bran, herbs, lemon juice, flakes and salt in one plate.
  • Pour the milk in another plate.
  • Cut the paneer in the slab of the size that you like.
  • Dip the paneer in milk, on both side.
  • Move it to the bran herb mix.
  • Cover it generously and press some mix on it lightly ,as well.
  • Heat the pan on a medium low heat until it is nice and hot.
  • Add few drops of oil. Once it is hot enough, lower the paneer in the pan and let it stand there for a few min. Do not move it to check.

crusted paneer1 (1)

  • Once you can see brown edges, add a few drops of oil on the uncooked side and flip it gently.
  • Press it gently to make sure the crust cooks well on the other side as well.
  • Transfer on serving dish and serve with a lemon.

I ate it with a methi roti and added a tsp of cheese spread on it, turning the paneer and roti into a burrito-ish.

Notes-

  1. Next time I will like to add a few nuts to the bran as well.
  2. In case you do not have fresh herbs, go ahead and use the dried ones- but fresh ones are more preferred. 🙂
  3. Adding more oil is not necessary, trust me. Your pan needs to be good, though.
  4. Adding a few drops of milk on the crust [while adding the crust on top of the paneer] will make sure it sticks well.

crusted paneer2 (2)

Processed with VSCOcam with p5 preset

Cheers,

Pallavi

Pear Salad with Sweet lime/Mausambi Juice dressing

What a party in my mouth this one was ❤ This healthy salad has very less oil and is gorgeous to serve and even travels well [pack the vinaigrette separate]. 🙂

You shall need: [serves 1]

100 gms Salad leaves of your choice [Personally I love a mix but yesterday I had only iceburg] – tear it up

1/4 cup Pomegranate Seeds

1 medium size pear [peel and chopped]

Juice  of 1 Sweet lime/Mausambi

1 tsp Lemon juice

1/4 tsp Red chilly flakes

1/2 tsp Olive oil

1 tsp Fennel seeds

Salt to taste

Method:

  • In a small bottle, add the sweet lime juice, lemon juice, flakes, salt and fennel seeds.
  • Shake it well and  keep in the fridge – This one can stay for upto 3 days in the fridge in an airtight container
  • On a bowl, put the salad leaves, pear and pomegranate. Sprinkle dressing as need be and devour with love.
Processed with VSCOcam with c1 preset

Cheers

Pallavi

Healthy Broken Wheat/Daliya Snack

So you are sitting in the living room and staring at the gorgeous stuff that people that people click with their magical little boxes called camera. While you can sit there and feel about you not having the patience to do the same or you can work your magic in creating something you are proud of you.

I am of the latter kind. While I feel terrible at times for not paying enough attention to these details like presentation and story telling. So is it the ingredient that keeps me going, YES. I am a loyalist when it comes to food habits. I have always been a fan of the broken wheat/bulgur. My healthy eating days are here to stay so I have been giving this gorgeous ingredient a spin of all kinds.

You shall need: [Makes about 20 small balls]

1/2 cup broken wheat

3 cup water

1/4 cup chopped fresh corriander leaves

2 tbsp bajra/jowar/ragi/besan/while wheat flour [I used Bajra Flour]

Salt and red chilly powder

juice of half a lemon

Oil

Peniyaram pan/non stick pan

fork

bowl

Spoon

kitchen towel

Sieve

Method:

  • Wash the broken wheat 2-3 times.
  • Soak it in 1 cup water for 20-30 min.
  • Bring 2 cup water to a simmer and add the broken wheat [minus the soaking water]
  • Reduce the flame to medium and stir using a fork occasionally.
  •  Once it cooks, it will be double in volume and the water will almost be gone. – say 12-15 min or so
  • Put the wheat in a strainer to get rid of extra moisture.
  • Cover the strainer with a tea towel. Stir it with fork a few times till this cools.
  • Move the wheat to a bowl once it is cool to touch.
  • Add the flour, salt, corriander, lemon juice and red chilly powder. Taste to adjust the spice.
  • Heat the pan and add a drop of oil in each slot.
  • Using a spoon, scoop the mix and make tiny balls of it.
  • Put these in the pan and let them brown well on all sides.
  • Once done, serve with love.
Processed with VSCOcam with c1 preset

Cheers,

Pallavi

Instant Ragi and oats Dosa

The frantic rush to fix a breakfast gets to me sometimes. But then missing ingredients also has the same effect. I wanted to eat rava dosa but there was no rice flour 😦

Hence look around and find what all is available, do a quick calculation in the  head and voila breakfast is ready.

So why should we eat ragi? Here are top 5 reasons:

  • Controls Blood sugar
  • Assists in weight loss
  • Relaxes muscles
  • Fights Anemia
  • Great source for Proteins

And why should we eat Oats? Here are top 5 reasons:

  • Enhances Immune response
  • Acts as a natural laxative
  • Reduces risk of cardio vascular disease
  • Controls Blood pressure
  • Lowers Bad cholesterol

You shall need: [Feeds 4]

3/4 cup Ragi Flour

1/3 cup Whole wheat flour

1/3 cup Fine bulgar/daliya

1/2 cup oats – measure first then whiz them in a mixer to make a powder.

1 medium onion chopped finely

2 green chillies finely shopped

2 cup buttermilk [I used about 100 ml of Amul spiced butter milk as well] – mix 4-5 tbsp of curd with 1.5 cups of water

Salt and pepper to taste

Oil

Non stick pan

Whisk

bowl

Spatula

Method:

  • In a bowl, mix all the dry ingredients.
  • Mix using the whisk.
  • Add the onions and green chilly.
  • Pour the butter milk in the mix. We want a runny mix, like that of the rava dosa/crepe.
  • Keep it aside for 5-10 minutes.
  • In case the mix looks thick, add little water to get it to the consistency we want.
  • Heat a non stick pan and put 2-3 drops of oil on it.
  • Pour a ladle-ful of the mix on it. Flatten it well.
  • Flip it using the spatula.
  • Cook well on the other side as well.
  • Serve hot with your favourite chutney.

dosa ragi1

Processed with VSCOcam with m5 preset

Cheers,

Pallavi

Barley Risotto

Oh what thunderous response this one got me, day before. 🙂 Thank you for the love, people. Barley is great substitute for rice in your life. It is a little tricky looking seed but it does wonders. I adapted this recipe.

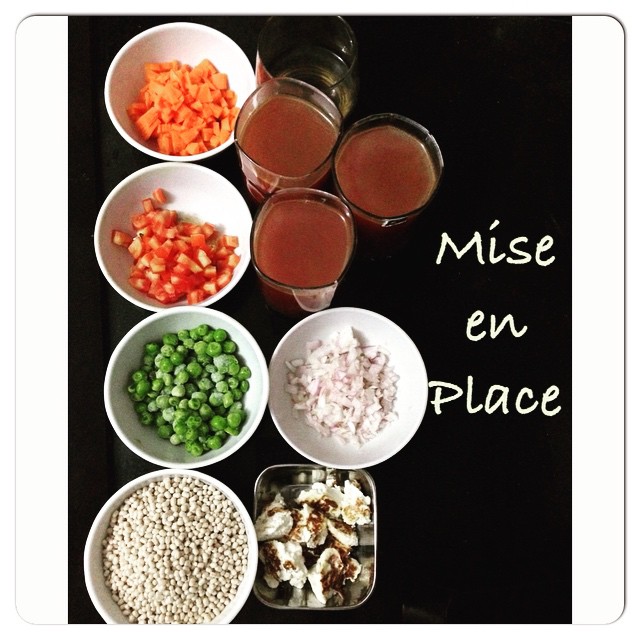
You shall need: [Serves 2]

1/2 cup.. Pearl Barley- soaked for 20 min in warm water- discard the water and place it on a tea towel to remove the moisture

1.. small onion chipped fine

3 cloves of garlic – minced

2 tsp… olive oil

1.4 cup white wine- optional*

1.. medium carrot diced small

1… tomato- de-seeded and chopped small

1/4 cup… blanched peas

1/3 cup… paneer [soft] or ricotta- make a paste with the cheese spread [Homemade ricotta cheese recipe coming soon]

1 tbsp… cheese spread

salt and pepper

3 cups… stock [I used the home made beets stock]

cheese [Optional]

1/2 cup… milk

Method:

  • In a pan, add the oil. Once it is heated, add the onions.
  • Once they are nice and translucent. Add the garlic and let them get the oil and onion flavour on them.
  • Add a little salt at the point.
  • Add the barley and let it toast for a few minutes.
  • Add salt and pepper.
  • Add the carrot, wine and one cup of stock.
  • Reduce the flame to medium and let it absorb the stock.
  • Add another cup of stock when you see the grains are dry-ish.
  • Repeat the process until all the stock is over.
  • Add half of the paneer-cheese mix and the milk.
  • Check the grain, it should not be mushy but should be fully cooked.
  • Add the peas and tomatoes and cover with a lid.
  • Cook like this for 5 min.
  • Mix some cheese through, right before serving.
  • Serve hot topped with cheese and paneer.

barley risotto1 barley risotto

Cheers,

Pallavi

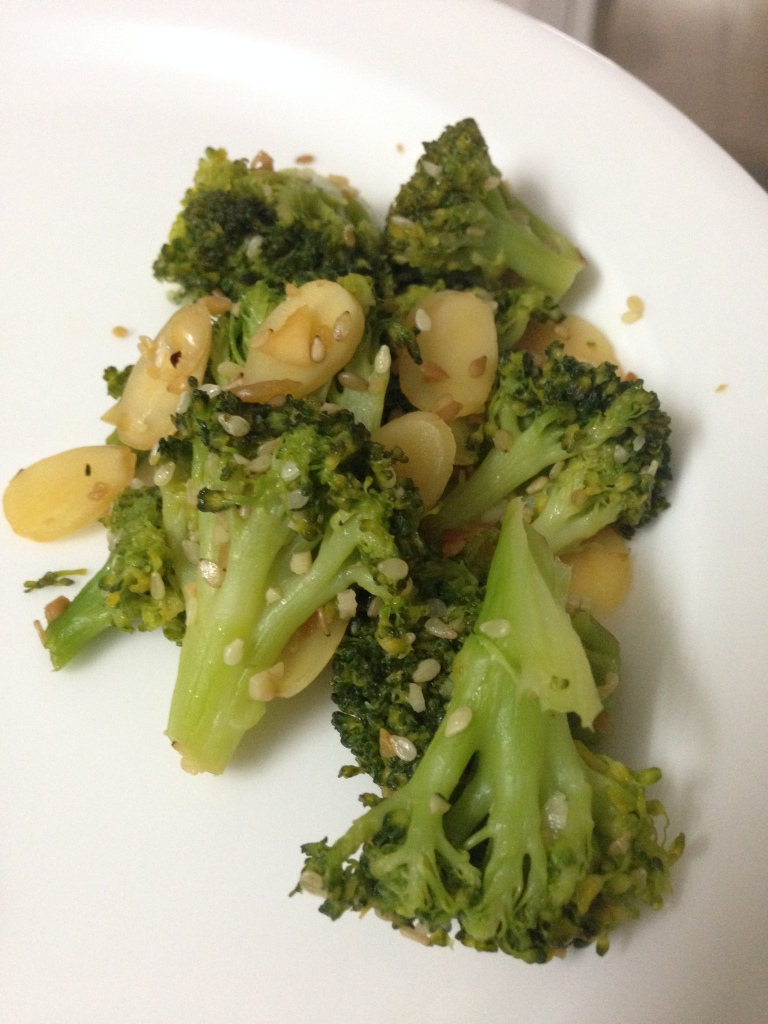
Warm Broccoli and Almond Salad

Since we moved to the new house, I didnt do anything special for us. So I planned a date night. Got dressed up, cooked a lovely meal and ofcourse we clicked pictures.

Oh and do you know about the #100sareepact ? So whoever joins in promises to wear a saree 100 times in a year. Not tooo much to ask, for sure. Plus I love wearing sari 🙂

Coming to the Broccoli salad. Here are few things about broccoli that will inform you about why it is important to eat it:

  • Lowers cholestrol (steamed ones)
  • De-toxification of the body
  • Anti-inflammatory
  • Cancer prevention
  • 1/2 a cup of brocolli has about 22 calories
  • Lots of fiber
  • Helps damaged skin
  • Keeps eyes healthy

So what are you waiting for, get that tree of life and get cooking. 🙂

Here is what you shall need for my recipe: [serves 2]

1 head/about 1.5 cup… medium size florets of a broccoli

1/2 tsp… Chilly oil/garlic oil/olive oil/any oil that you like

1 tbsp… Sesame seeds (white)

1/4th cup… Almond flakes

1 tsp… roasted garlic / minced fresh garlic

Salt and pepper to taste

1/8th cup … water

A non stick pan

Method:

  • Wash the broccoli thoroughly and keep aside.
  • In the pan, heat the oil, add the sesame, garlic and  almond flakes.
  • Roast them on a medium heat until the seeds pop.
  • Remove from heat and empty the contents in a bowl to be used later.
  • In the same pan, add the broccoli and salt and half of the water.
  • Cover and cook on a medium heat for about 2 min.
  • Water would have evaporated, if not check the done-ness of the brocolli. We don’t want a mush. Insert a knife in one of the florets and make sure it is able to pierce the floret easily.
  • Stop cooking instantly/add more water if needed.
  • Once done, take it out in a bowl and place over another bowl of cold water. We want the green color to be intact hence, shocking it will do the trick.
  • Once it is nice and warm/not hot, add the sesame and almonds.
  • Serve with love.

IMG_2858Cheers,

Pallavi

Sending this to: Jacqueline’s blog and Food and Spice

Fuss Free Flavours, Utterly Scrummy and Elizabeth’s Kitchen Diary

Eat Your Greens‘ and A2K – A Seasonal Veg Table.