Hard Shell Tacos

Last Saturday, I was determined to dedicate myself to the idiot box and I did. Since I was up at 6 am as P was leaving for work, I turned the TV on and one after the other I saw 8 flicks (Most of them side by side). Oh and did I mention, this was only till 1 pm.

I was bored to death by the time I was on the 5th flick which happened to be one of my favorite ones, Zindagi Na Milegi Dubara. While fiddliing with the remote, a magazine fell on the floor. It was Good Food India, August issue. On the cover page there were gorgeous hard shell tacos with Pindi chana filling. I said “Challenge accepted” to myself and headed for the kitchen.

Thank God I had maize flour else the plan would have been shelved. Let me take you through the recipe.

You shall need: (Makes about 8)

2/3 cup… Maize flour

1/3 cup.. All purpose flour

1/2 tsp.. Salt

1 tsp… Paprika

1.5 tsp… oil

1/2 cup… warm water (Use very little at a time)

To assemble:

Sour cream

Lettuce

Re-fried beans

Method:

  • In a bowl, mix the flours, salt and paprika with a whisk.
  • Add the oil.
  • Now add few tbsp of water at a time and knead the dough.
  • We want the dry ingredients to come into a soft ball. Do not add all the water at the same time.
  • The Qty of water shall depend on the ingredients and their quality.
  • The dough should take about 2-3 min.

IMG_8635

  • Wrap the dough in cling film and set it aside for atleast 30 min.
  • Pre heat oven to 180C on the setting where both the rods are heating.
  • Set a pan on the gas on low-medium flame.
  • Divide the dough into 8 balls of the same size.
  • Apply little oil on the rolling pin and the board.
  • Roll them one by one to the thickness of a INR 2 coin.
  • Using a round mould, you may cut the rolled dough to a perfect round.
  • Using a fork, prick the rolled dough.

IMG_8641

  • Put it on the pan and let it color slightly on both sides.
  • If you are using a non stick pan, you will not need any oil.
  • We only want a nice bright yellow color on both the sides.

IMG_8642

  • wrap the cooked tacos on the wired rack of the oven. Do not pinch the sides too much else there will be no opening in the tacos. keep the folded sides fairly apart.

IMG_8644

  • Bake them for 10-12 min or until they are nice and crisp and golden.

IMG_8647

  • Let them cool and stuff with the filling of your choice.

IMG_8650 IMG_8652

Cheers,

Pallavi


Sending this to:

 originally hosted by Vardhini of Cooks Joy

 by Vardhini of Cooks Joy

  UK Rasoi- “What’s with my Cuppa !?” 


Tuver Seeng ni Kachori #BM38

I have spoken about tuver sing here and here. 🙂 It is a fabulous vegetable and is very close to gujju hearts.

Check out the Blogging Marathon page for the other Blogging Marathoners doing BM# 38

You shall need:

For the outer cover:

2 cup… Wheat flour
4 tbsp… oil
2 tsp… salt
Water

For the filling:

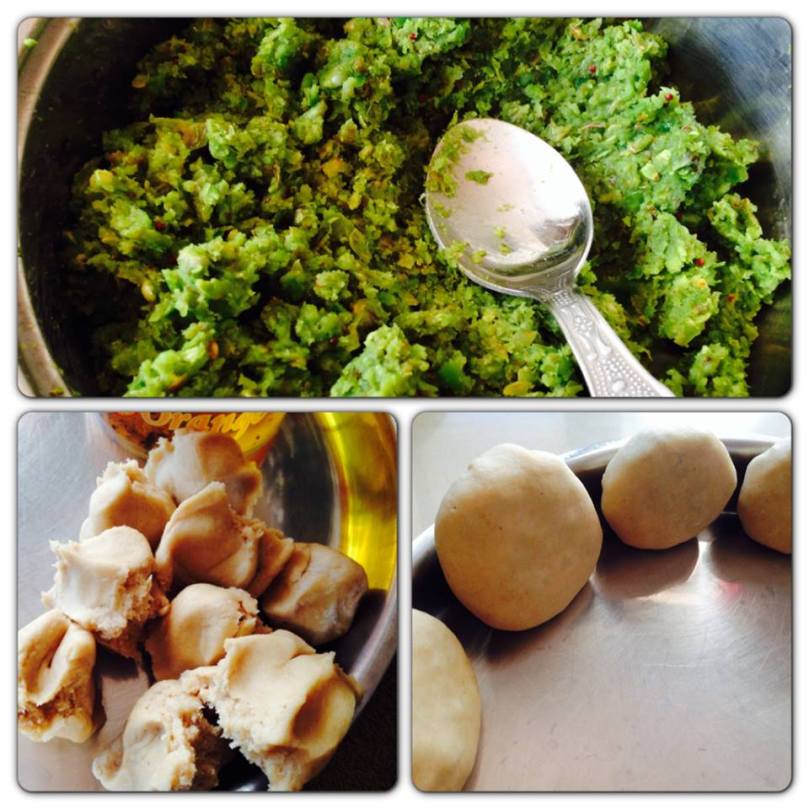
1.5 cup…. Shelled tuver sing
2 tbsp… oil3-4… green chillies
1 tbsp… Jeera/cumin seeds
2 tbsp… Sugar
2 tsp… Mustard seeds
Salt to taste
Oil to fry

Method:

  • Knead the dough using the wheat flour.
  • It needs to be tight enough like we make for pooris.
  • Keep it in an air tight container until further use.
  • In a mixie jar, add the green chillies and make it into a paste.
  • Now add the tuver sing, little at a time and grind it into a coarse paste.
  • In a wok, heat 2 tbsp oil and add the cumin and mustard seeds.
  • Add the tuver sing and green chilly mix.
  • Let it cook for 5 min on a low-med heat.
  • Now add sugar and let it mix well.
  • Once the mix starts to turn to a darker shade of green, turn off the gas and let it cool to room temp.
  • Put the oil in another wok for deep frying.
  • Now make about 25-30 balls out of the dough.
  • Roll them out little and add about 1-1.5 tsp of the mixture.
  • Close the ends and secure properly.
  • Fry about 5-6 at a time and let me get nice and golden from all sides.
  • Serve for breakfast, snack, lunch, supper with love. 🙂

tuver singCheers,

Awamat #BM38

These delish sweet treats from Lebanon come in handy for all occasions. These treats are fried until golden brown and immersed in simple sugar syrup.

Check out the Blogging Marathon page for the other Blogging Marathoners doing BM# 38

You shall need:

1 cup… flour
1 tsp…. sugar
3/4  cup…  water
3/4 tsp… dry yeast
1/4 tsp… salt
oil for frying

For Syrup:
3/4 cup… Water1 cup… Sugar
1 tsp… Lemon Juice

Method:

  • In a small bowl, add 2 tbsp warm water and 1 tsp sugar. Add yeast in it and let it stand for 10 min.
  • In another bowl, mix flour, salt and the yeast.
  • Add water little at a time and knead into a dough.
  • Let it stand for 1 hour or until the dough doubles.
  • Punch it down, make a long log out of it and cut small pieces.
  • Fry in hot oil on a medium-high heat until they are evenly golden.
  • In a pan, boil the sugar, water and lemon juice until all the sugar is dissolved.
  • Add lemon juice and let the syrup cool a bit.
  • Strain the syrup through a mesh.
  • Once the syrup is at room temp, tip in all the fried dough.
  • It shall soak the syrup quickly.
  • Serve as a snack or a sweet treat.

image(44)Cheers,


Arancine: Daring Kitchen

When life throws you risotto, make Arancini!

Oh so well said 🙂 We as Indians love anything that is thrown in a deep fryer in a way, Arancini is a crisp rice ball with a gooey center and a sauce to die for.

So, I made Saffron Risotto for this Arancini. It is super duper easy to make and more more awesome to devour.

So what all do we need for this?

A portion of risotto of your choice {chilled}

Few tiny squares of mozzarella cheese

1/4 cup… All purpose flour

1/2 cup… Bread crumbs

1 egg (This is optional as I made a batch with egg and one without egg. If you are not using the egg, you may use few tbsp milk)

Oil to deep fry

Method:

  • Heat the oil in a pan.
  • Take 3 bowls and put the flour, bread crumbs and egg/milk respectively.
  • Take a table spoon and scoop out a ball from the cold risotto.
  • Place a cheese cube in the center and roll it well.
  • Put it in the flour first, then the milk/egg and finally bread crumbs.
  • Once all the balls are ready, put them in the oil to fry on a medium heat. Make sure the oil is not very hot else the crumbs shall turn black as soon as you put them in.
  • Once they are nice and brown, take them out and serve with the sauce of your choice.

photo 2

Sending this to:

at Gayathris cook spot

at Cuisini Delights

at Cook Click n Devour

at Simply.food

Cheers,

I: Idada

Aah straight from the heartland of sweet, sour, savory food. Gujarat. 🙂 I am falling in love with the cuisine. Idada is a snack that is very close to Idli batter from Southern India.

This post is a part of Blogging Marathon. For the first week of BM#32 [2nd – 7th Sep], I am going Regional.

Check out the Blogging Marathon page for the other Blogging Marathoners doing BM#32.

You shall need: {Serves about 4 people for snacks}

2 cup… Urad dal

1 cup… Tuvar dal

1 cup… Rice

a pinch of soda bi carb

4-5 green chillies

2 inch piece of ginger

Water

2-3 tbsp … oil plus more for greasing the trays

Steamer and trays

2 tbsp… Sesame seeds

Red chilly powder

Method:

  • Wash and soak the lentils and rice overnight or 8 hours atleast.
  • Grind them with chillies and ginger to a fine paste.
  • Add bi carb and salt.
  • Let this mixture stand for 4-5 hours and ferment.
  • Grease the thali in which you shall steam the Idada, fill it with about 1/3 with the mixture.
  • Sprinkle some sesame seeds and red chilly powder on top and let it cook for 12-15 min or until it is done.
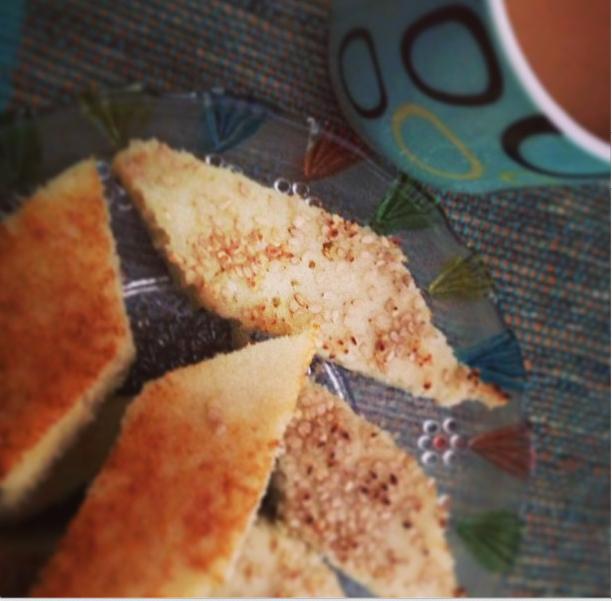
  • Once cooked well, cut in shapes of your choice.
  • In a non stick pan, pour a tbsp of oil, sesame seeds and red chilly powder. Put a few pieces at a time and reduce the heat to low. The idada shall begin to form a nice crust, toss it again and serve with side of your choice. Traditionally, it is served with sesame oil.
Pic: Monika Manchanda

Cheers,

H: Hara Panner Tikka

I try to keep a box of green chutney in the fridge. Please note that the key word here is TRY. Not that it happens all the time. Sheelu from cookcookandcook makes kick ass chutney and I had a box full in the fridge thanks to her. 🙂

Paneer Tikka is a famous Snack from Notherns India. On the days when I am low carbing, this comes to rescue. I dont go through the pain of grilling them in the oven, I do it on the shallow pan and it gives me great results.

This post is a part of Blogging Marathon. For the first week of BM#32 [2nd – 7th Sep], I am going Regional.

Check out the Blogging Marathon page for the other Blogging Marathoners doing BM#32.

You shall need:

200 gms… Panner [Diced]

5-6 tbsp…Green chutney

3-4 tbsp… Thick curd

Salt and red chilly powder

1 … capsicum [diced]

1.. onion [diced]

3-4 tbsp…. tomato puree

Kasoori methi- optional

Few tbsp oil

Method:

  • In a bowl, mix curd, chutney, salt and red chilly.
  • Add paneer to it and let it marinate for 20-30 min.
  • In a non stick pan, put a few drops of oil and then add the paneer pieces, one by one.

photo(2)

  • Let them cook and brown well on one side, flip them
  • Once they cook on all sides equally, take them out in a plate and keep aside.
  • In the same pan, add a few drops of oil and pour the puree and remaining marinade from the bowl.
  • Cook the onions and capsicum in it slightly and add the paneer.
  • Toss them around and serve warm.

photo(6)Cheers,

F: Fresh Figs Cookies

I am in love with the texture of figs. The fresh ones, the ones few days old in the fridge and even the dried version. These cookies are a hit in our offices and we so so so loved it that I make them as much as I can.

This post is a part of Blogging Marathon. For the first week of BM#32 [2nd – 7th Sep], I am going International/Fusion.

Check out the Blogging Marathon page for the other Blogging Marathoners doing BM#32.


You shall need:

1 cup… All Purpose Flour

1/2 tsp .. baking powder

1/2 tsp.. Salt

1/2 cup… White sugar

1/3 cup… butter

1 tbsp… vanilla essence

1.. Egg

2/3 cup… Chopped fresh figs

Method:

  • Beat sugar and butter until nice and fluffy.
  • Add egg and beat.
  • Add the vanilla.
  • In a smaller bowl, whisk together flour, baking powder and salt.
  • Mix dry with the wet and work the dough till it comes together.
  • Pre heat oven at 180C.
  • Make small balls of the dough and bake for 12-15 min until nice and golden.

13 - 7

Cheers,

Herbed Potato and cheese Monkey bread

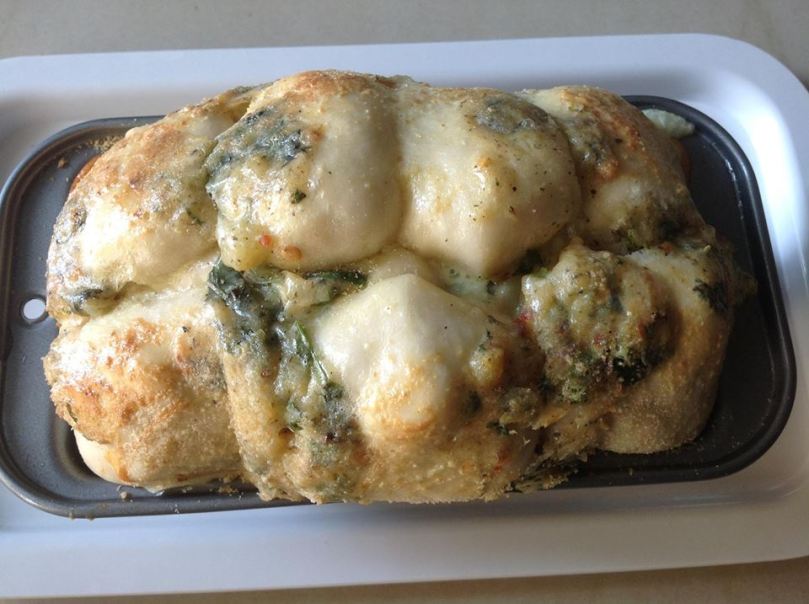
Manjula from Desi Fiesta challenged us to make breads for last months home bakers challenge. She had a version of sweet pull apart bread but since the family loved savory breads, I had to make some changes. 🙂

So what is this monkey bread? It is a bread that one eats like a monkey eats fruits from the trees.

You shall need:

For the dough-

3 cup… All purpose flour [plus some more for dusting]

1 tbsp… Salt

2 tbsp… Fresh yeast  [or 1 tbsp dry active]

2 tbsp… Butter

1.5 cup… Water

For the filling:

3 … boiled potatoes

1 cup… Cheese [I used mozzarella]

Salt and pepper to taste

1/2 tbsp.. Chilly flakes

2 tsp.. Oregano

2 tbsp… Fresh corriander

Some bread crumbs to sprinkle on top

Method:

  • Knead the dough like this.
  • Keep it on a big bowl and cover with a wet kitchen towel.
  • Let it rise for 1.5 hrs.
  • Punch it down and make ping pong ball size dough balls out of it.
  • Mix all the ingredients for the filling.
  • Flatter the dough ball and add a small amount of the filling to it.
  • Cover the filling with the dough and seal it well.
  • In a greased bread pan/rectangle pan/bundt pan/cake pan, arrange it properly.
  • Repeat for all the dough balls.
  • If there is extra filling, put it in between the dough balls.
  • Let it rise again for 30 min.
  • Bake in a pre heated oven at 180C for 20-25 min.
  • When 15 min are gone by in the baking cycle, brush with an egg wash and sprinkle bread crumbs on top.
  • For the last 5 – 7 min, bake on both the rods on. This shall give the top a nice color.
  • Serve with love.

1005353_10151458387371324_1828812012_n

Cheers,

Sending this to:

hosted by Nandoo’s Kitchen and brain child of Nupur

hosted by Desi Fiesta brain child of Vardhini

Foodabulous hosted by Nivedhanams brain child of Preeti.

Healthy Bite

by Valli hosted at the magic sauce pan

Healthy Diet Logo by Priya hosted by Nivedhanam

Multigrain Beetroot Tarts

Well here is Blogging Marathon again 🙂 For the first week, I have chosen the theme Members special. Here the members penned down the things that want to learn or would love to make. We had to pick 3 out of the long list of the available ones.

First one for me is Multigrain Beetroot Tarts. We all know that tarts are essentially made from All purpose flour but then I gave it a twist and made it out of Bajra, Jowar and Whole Wheat flour. And this one also got me second prize at the Zopchef 2013. 🙂

Check out the Blogging Marathon page for the other Blogging Marathoners doing BM#31.

You shall need: [Makes about 24-30 depending on the size of your tarts]

1/2 cup… Whole Wheat Flour

1/3 cup… Bajra Flour

1/3 cup… Jorar Flour

1/4 cup… Ragi Flour

1/2 cup… Chilled butter cut in cubes

1/2 tbsp… Salt

1/4 cup… Boiled and pureed beets

1.5 tsp… Sugar

Water [if needed]

Method:

  • The tart must always be flaky and must have a bite to it. This is the reason it is very important that we use chilled butter, other ingredients can be on room temperature.
  • Put all the dry ingredients in a bowl.
  • Using a fork, mash the butter against the flours. Keep doing it until you get a bread crumb like texture.
  • Add the puree and make the dough. It must a be a firm dough so add the beets a little at a time.
  • Chill the dough, wrapped in a cling film, for 30 min atleast.
  • Now make small balls and roll it out to about 1/4th inch width and put it in the tart mould.
  • Bake in a pre heated oven at 180C for 12-15 min [Mine were small so baking time is reduced]
  • be careful as you would not be able to tell if they are burnt or not because of the color.
  • Take them out and let them cool for about few min.
  • Take out from the shell and add filling of your choice.

485535_500571223341632_1866950707_n 485422_10151408836836766_1383575424_n 382406_10151408841706766_2017659004_n

Cheers,

Sending this to:

hosted by Nandoo’s Kitchen and brain child of Nupur

hosted by Desi Fiesta brain child of Vardhini

Foodabulous hosted by Nivedhanams brain child of Preeti.


Healthy Bite


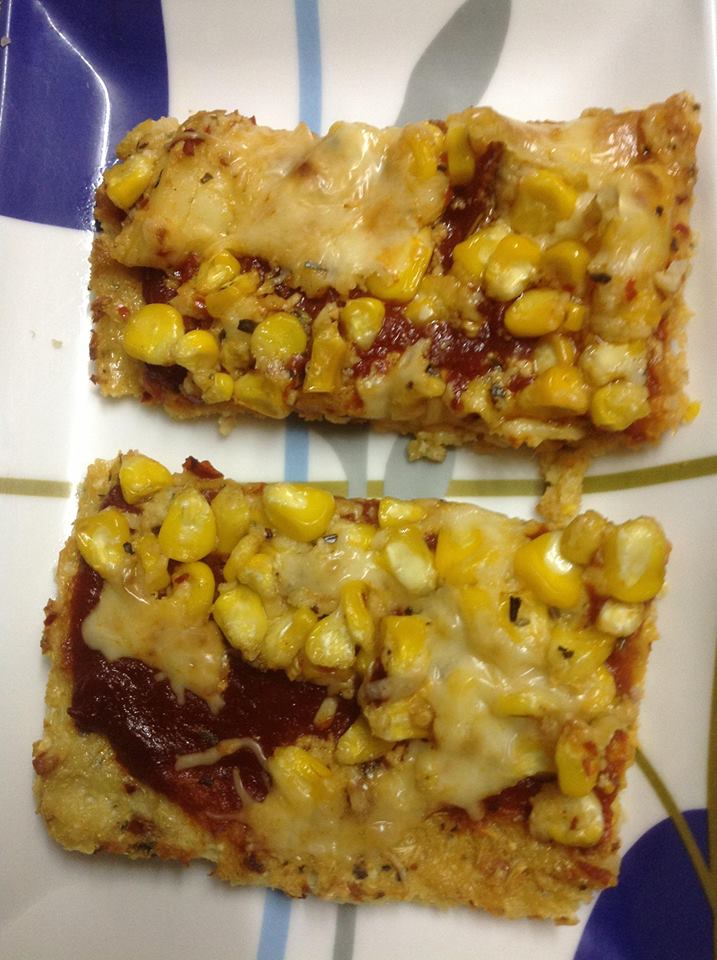
Low Carbs Pizza

Ever wondered if there was an alternate/healthier version of the otherwise loaded pizza. Being on a healthy-eating spree inspires me to read and understand and appreciate these alternate ingredients.

On one of the blogs I read something about Cauliflower rice to make pizza base. It is absolutely genius and easy to put together.

You shall need: [Feeds 2]

3 cups… Cauliflower Rice [Recipe follows]

Pizza Sauce of your choice

Toppings of your choice [ I used jalapenos, fresh corn kernels, olive oil, salt, pepper, oregano and chilly flakes and some mozzarella]

2 tbsp plus more… Cheese of your choice [I used a mix of Cheddar and mozzarella]

Salt

1 tbsp… Oregano

2 eggs [ I used 1 but the binding was not upto the mark. Hence 2 eggs must go in]

Method:

  • Clean the florets of the cauliflower.
  • Pulse it in a food processor until it resembles coarse rice.
  • Boil water in a pan and dunk the cauliflower rice in for 3 min.
  • Take it out on a cheese cloth and squeeze all the water out.
  • This needs effort and is worth the hard work.
  • Once it is nice and dry, add salt, pepper, chilly flakes, oregano, cheese and 2 eggs.
  • Mix well.
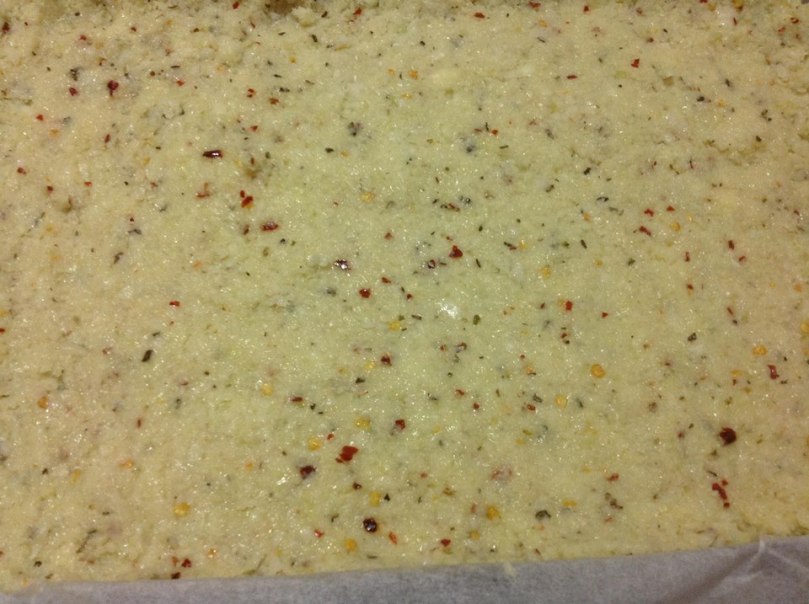
  • Line a try with butter paper and spread the cauliflower mix on it evenly.
  • Bake in a 200C pre heated oven for 25-30 min or until it is nice and golden.
  • Pull it out and arrange the toppings the way you like.
  • Bake for further 15 min at 220C and it is ready to serve.

cauliflower pizza1 cauliflower pizza

Cheers,

Sending this to:

  Valli’s Kids Delight event  Hosted By Kalyani

Vardhini‘s blog event hosted by Amrita.